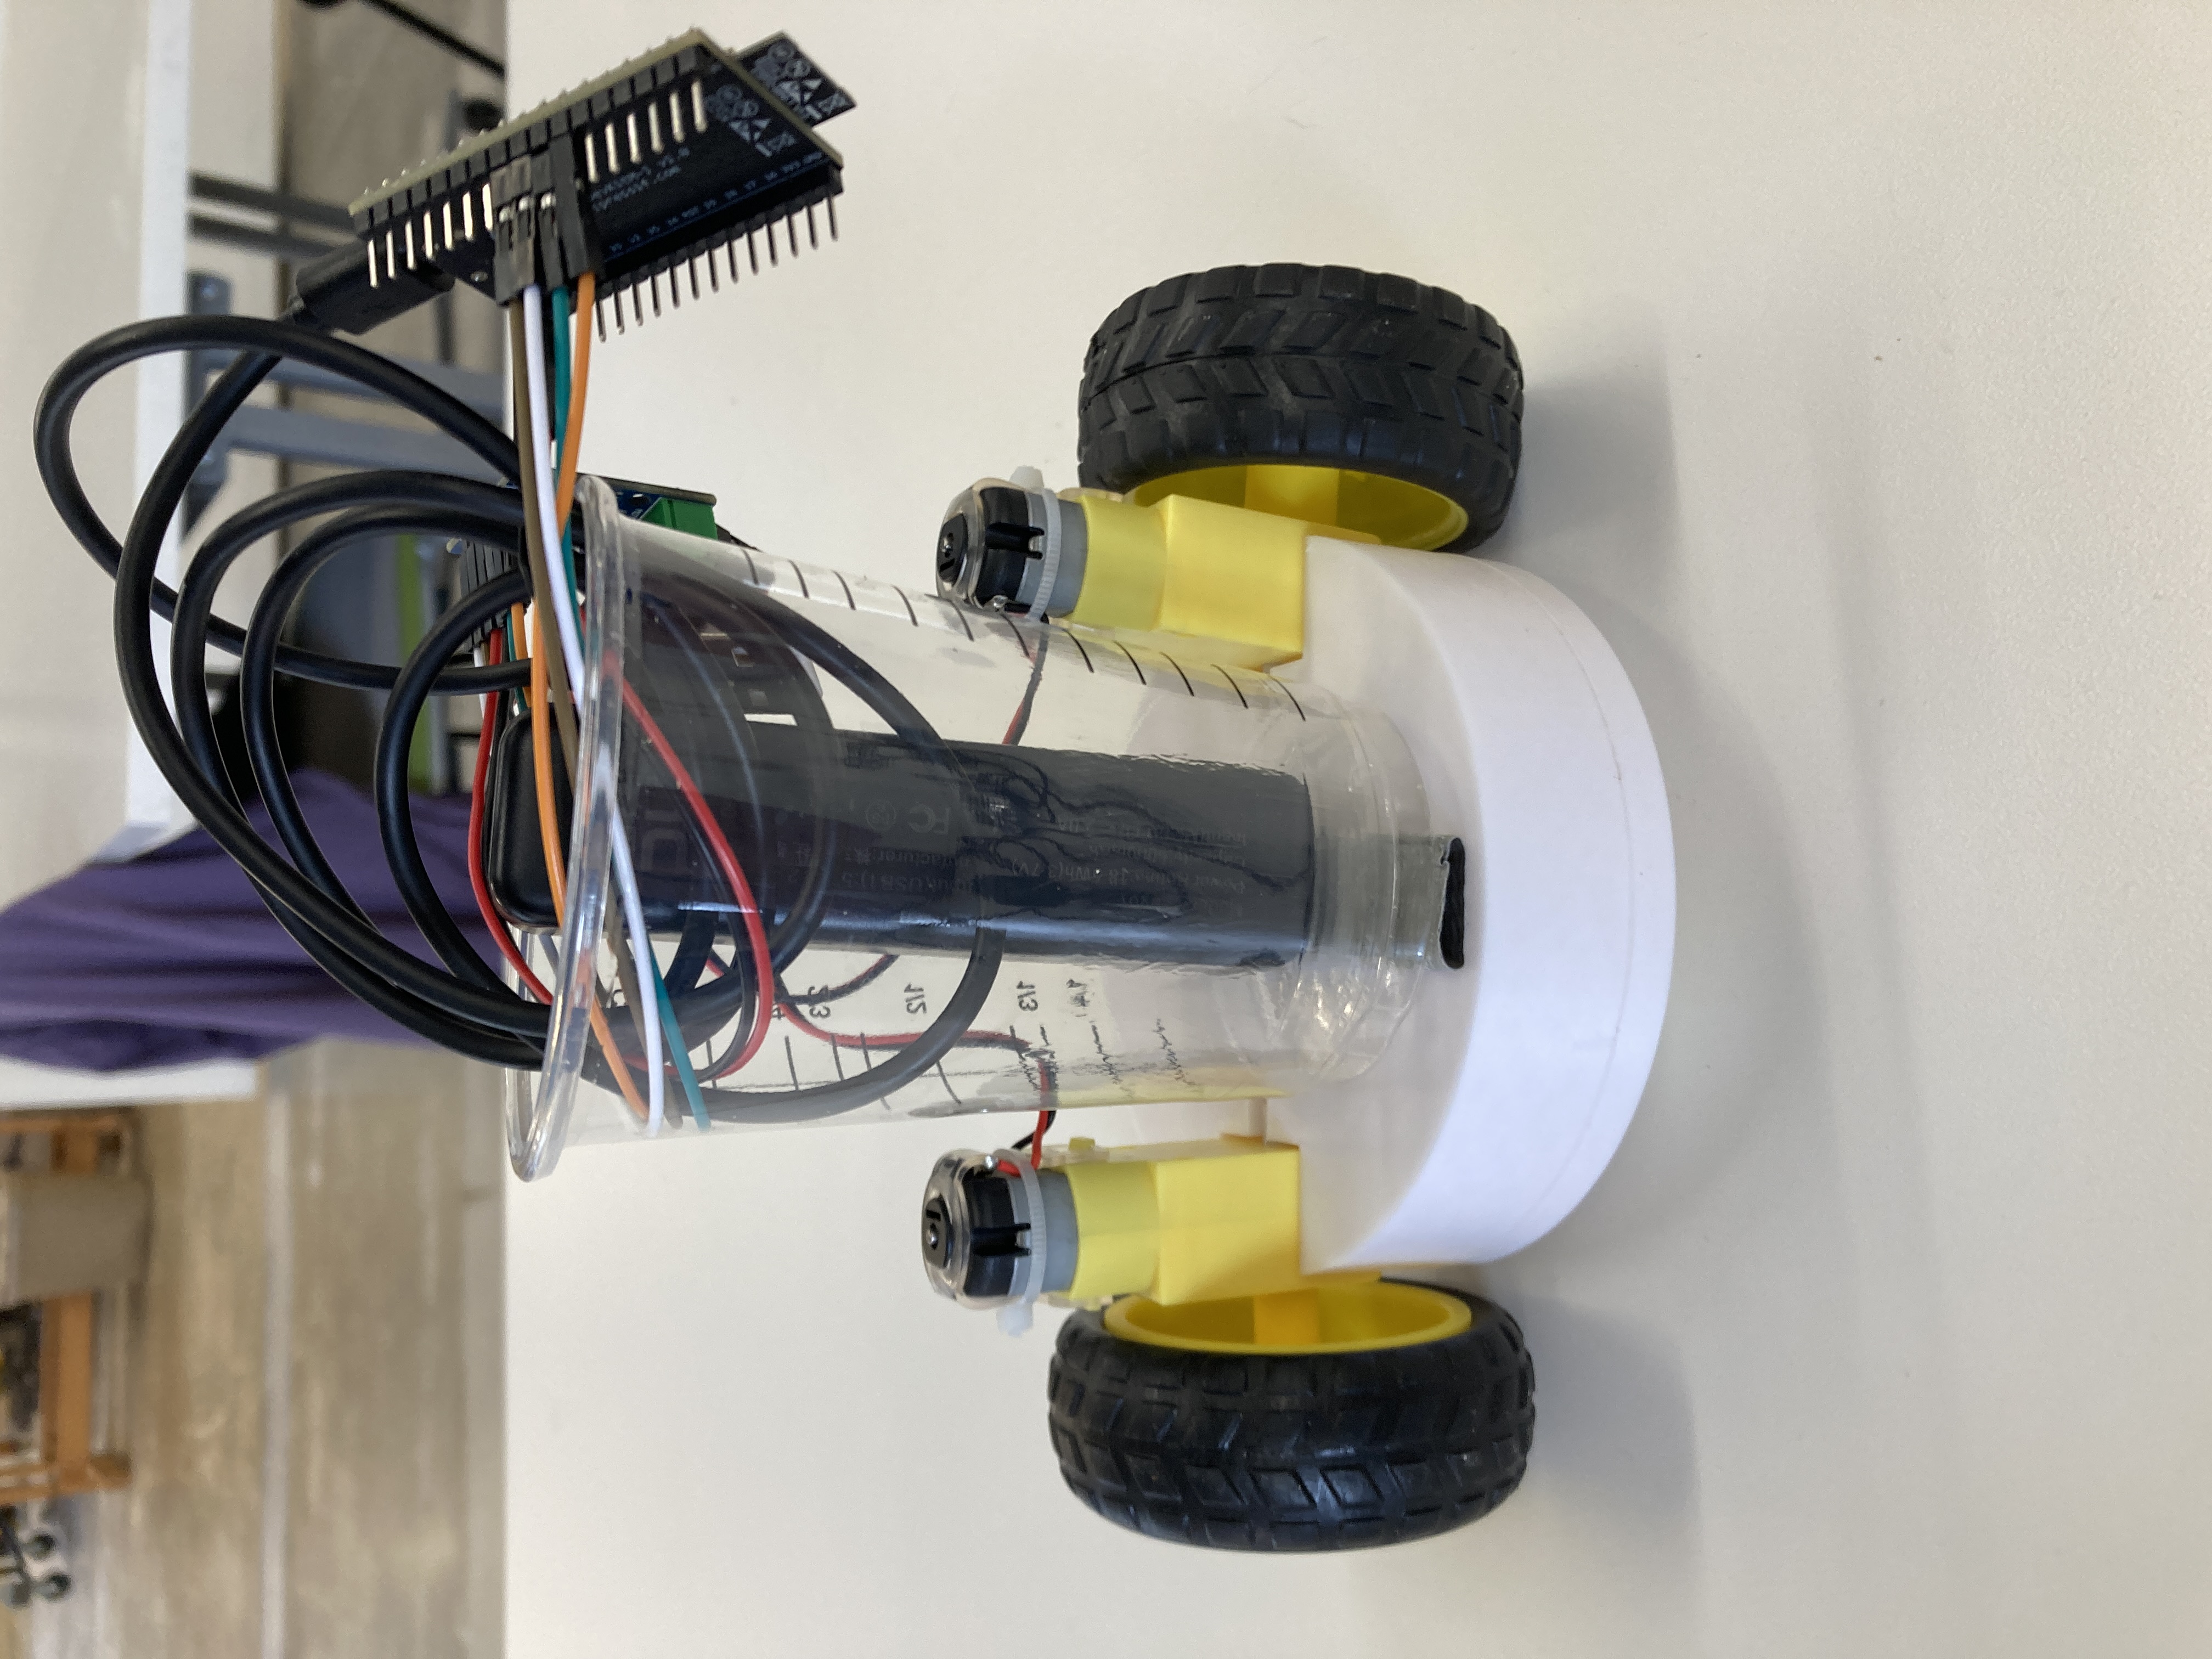
This week, I teamed up with Claire and Jackson to make a project that worked with WiFi. Our plan was to create a remote-control vehicle that works via WiFi. More specifically, we wanted the user to be able to tap an RFID card to a reader, and based on which card was tapped, the robot would either move forward or backward, or turn left or right.
We got started by splitting up the work a bit. Since I wanted to have a vehicle for my final project and Claire wanted RFID readers for hers, we decided to take on those two tasks. Jackson then worked on connecting the two endpoints. I wanted to model my design off a roomba since I saw one for the first time over spring break and was impressed by its turning ability. My plan was to put two motors attached to wheels on either side of a circle, and then have a ball acting as a third leg that could roll around without much friction. I went for the 3D printer on this one, but first spent a LOT of time taking measurements of the motors to allow them to fit in without other adhesives. Below are some pictures of the design process in Fusion 360:
Printing this took a while, including a couple of failed prints before switching over to a more reliable printer. Once I printed both parts successfully though, I was really happy with how well it snapped together! The two pieces and motors fit snugly without needing any glue or tape. The only part that didn't go as well as planned is the space for the ball was too low (I had difficulty placing this with precision in Fusion) This means the machine is a tiny bit off-balance and the ball can fall out the bottom (making the two-part design unneccessary) but overall it still moves around alright! Here's a picture of the motors in the frame:

I then hooked it up to the motor code Jackson had written which connected to an API he had written on NodeJS:
#include#include #include const char* ssid = "MAKERSPACE"; const char* password = "12345678"; const String speedUrl = "https://ps70-api.vercel.app/speed"; const String directionUrl = "https://ps70-api.vercel.app/direction"; const int motor1A = 18; const int motor1B = 23; const int motor2A = 10; const int motor2B = 5; const int freq = 5000; const int channel1 = 0; const int channel2 = 1; const int resolution = 8; class Motor { int A1A; int A1B; int speed; int direction; public: Motor(int channel, int pinB) { A1A = channel; A1B = pinB; speed = 0; direction = 0; pinMode(A1A, OUTPUT); pinMode(A1B, OUTPUT); } void driveMotor(byte d, int s) { if (d == 1) { ledcWrite(A1A, 255 - s); digitalWrite(A1B, HIGH); } else if (d == 0) { ledcWrite(A1A, s); digitalWrite(A1B, LOW); } } void setSpeed(int newSpeed) { speed = newSpeed; } void setDirection(int newDirection) { direction = newDirection; } void update() { if (direction == 0) { driveMotor(LOW, speed); } else if (direction == 1) { driveMotor(HIGH, speed); } } }; Motor motor1(channel1, motor1B); Motor motor2(channel2, motor2B); void setup() { ledcSetup(channel1, freq, resolution); ledcAttachPin(motor1A, channel1); ledcSetup(channel2, freq, resolution); ledcAttachPin(motor2A, channel2); Serial.begin(115200); WiFi.begin(ssid, password); while (WiFi.status() != WL_CONNECTED) { delay(1000); Serial.println("Connecting to WiFi"); } Serial.println("Connected to the WiFi network"); } void loop() { Serial.println("Refreshing"); int speed = 0; String direction = ""; if ((WiFi.status() == WL_CONNECTED)) { HTTPClient http; http.begin(speedUrl); int httpResponseCode = http.GET(); if (httpResponseCode > 0) { String payload = http.getString(); speed = payload.toInt(); } http.end(); http.begin(directionUrl); httpResponseCode = http.GET(); if (httpResponseCode > 0) { String payload = http.getString(); direction = payload; } http.end(); Serial.println(speed); Serial.println(direction); motor1.setSpeed(speed); motor2.setSpeed(speed); if (direction == "left") { motor1.setDirection(0); motor2.setDirection(0); } else if (direction == "right") { motor1.setDirection(1); motor2.setDirection(1); } else if (direction == "backward") { motor1.setDirection(0); motor2.setDirection(1); } else if (direction == "forward") { motor1.setDirection(1); motor2.setDirection(0); } motor1.update(); motor2.update(); delay(100); } }
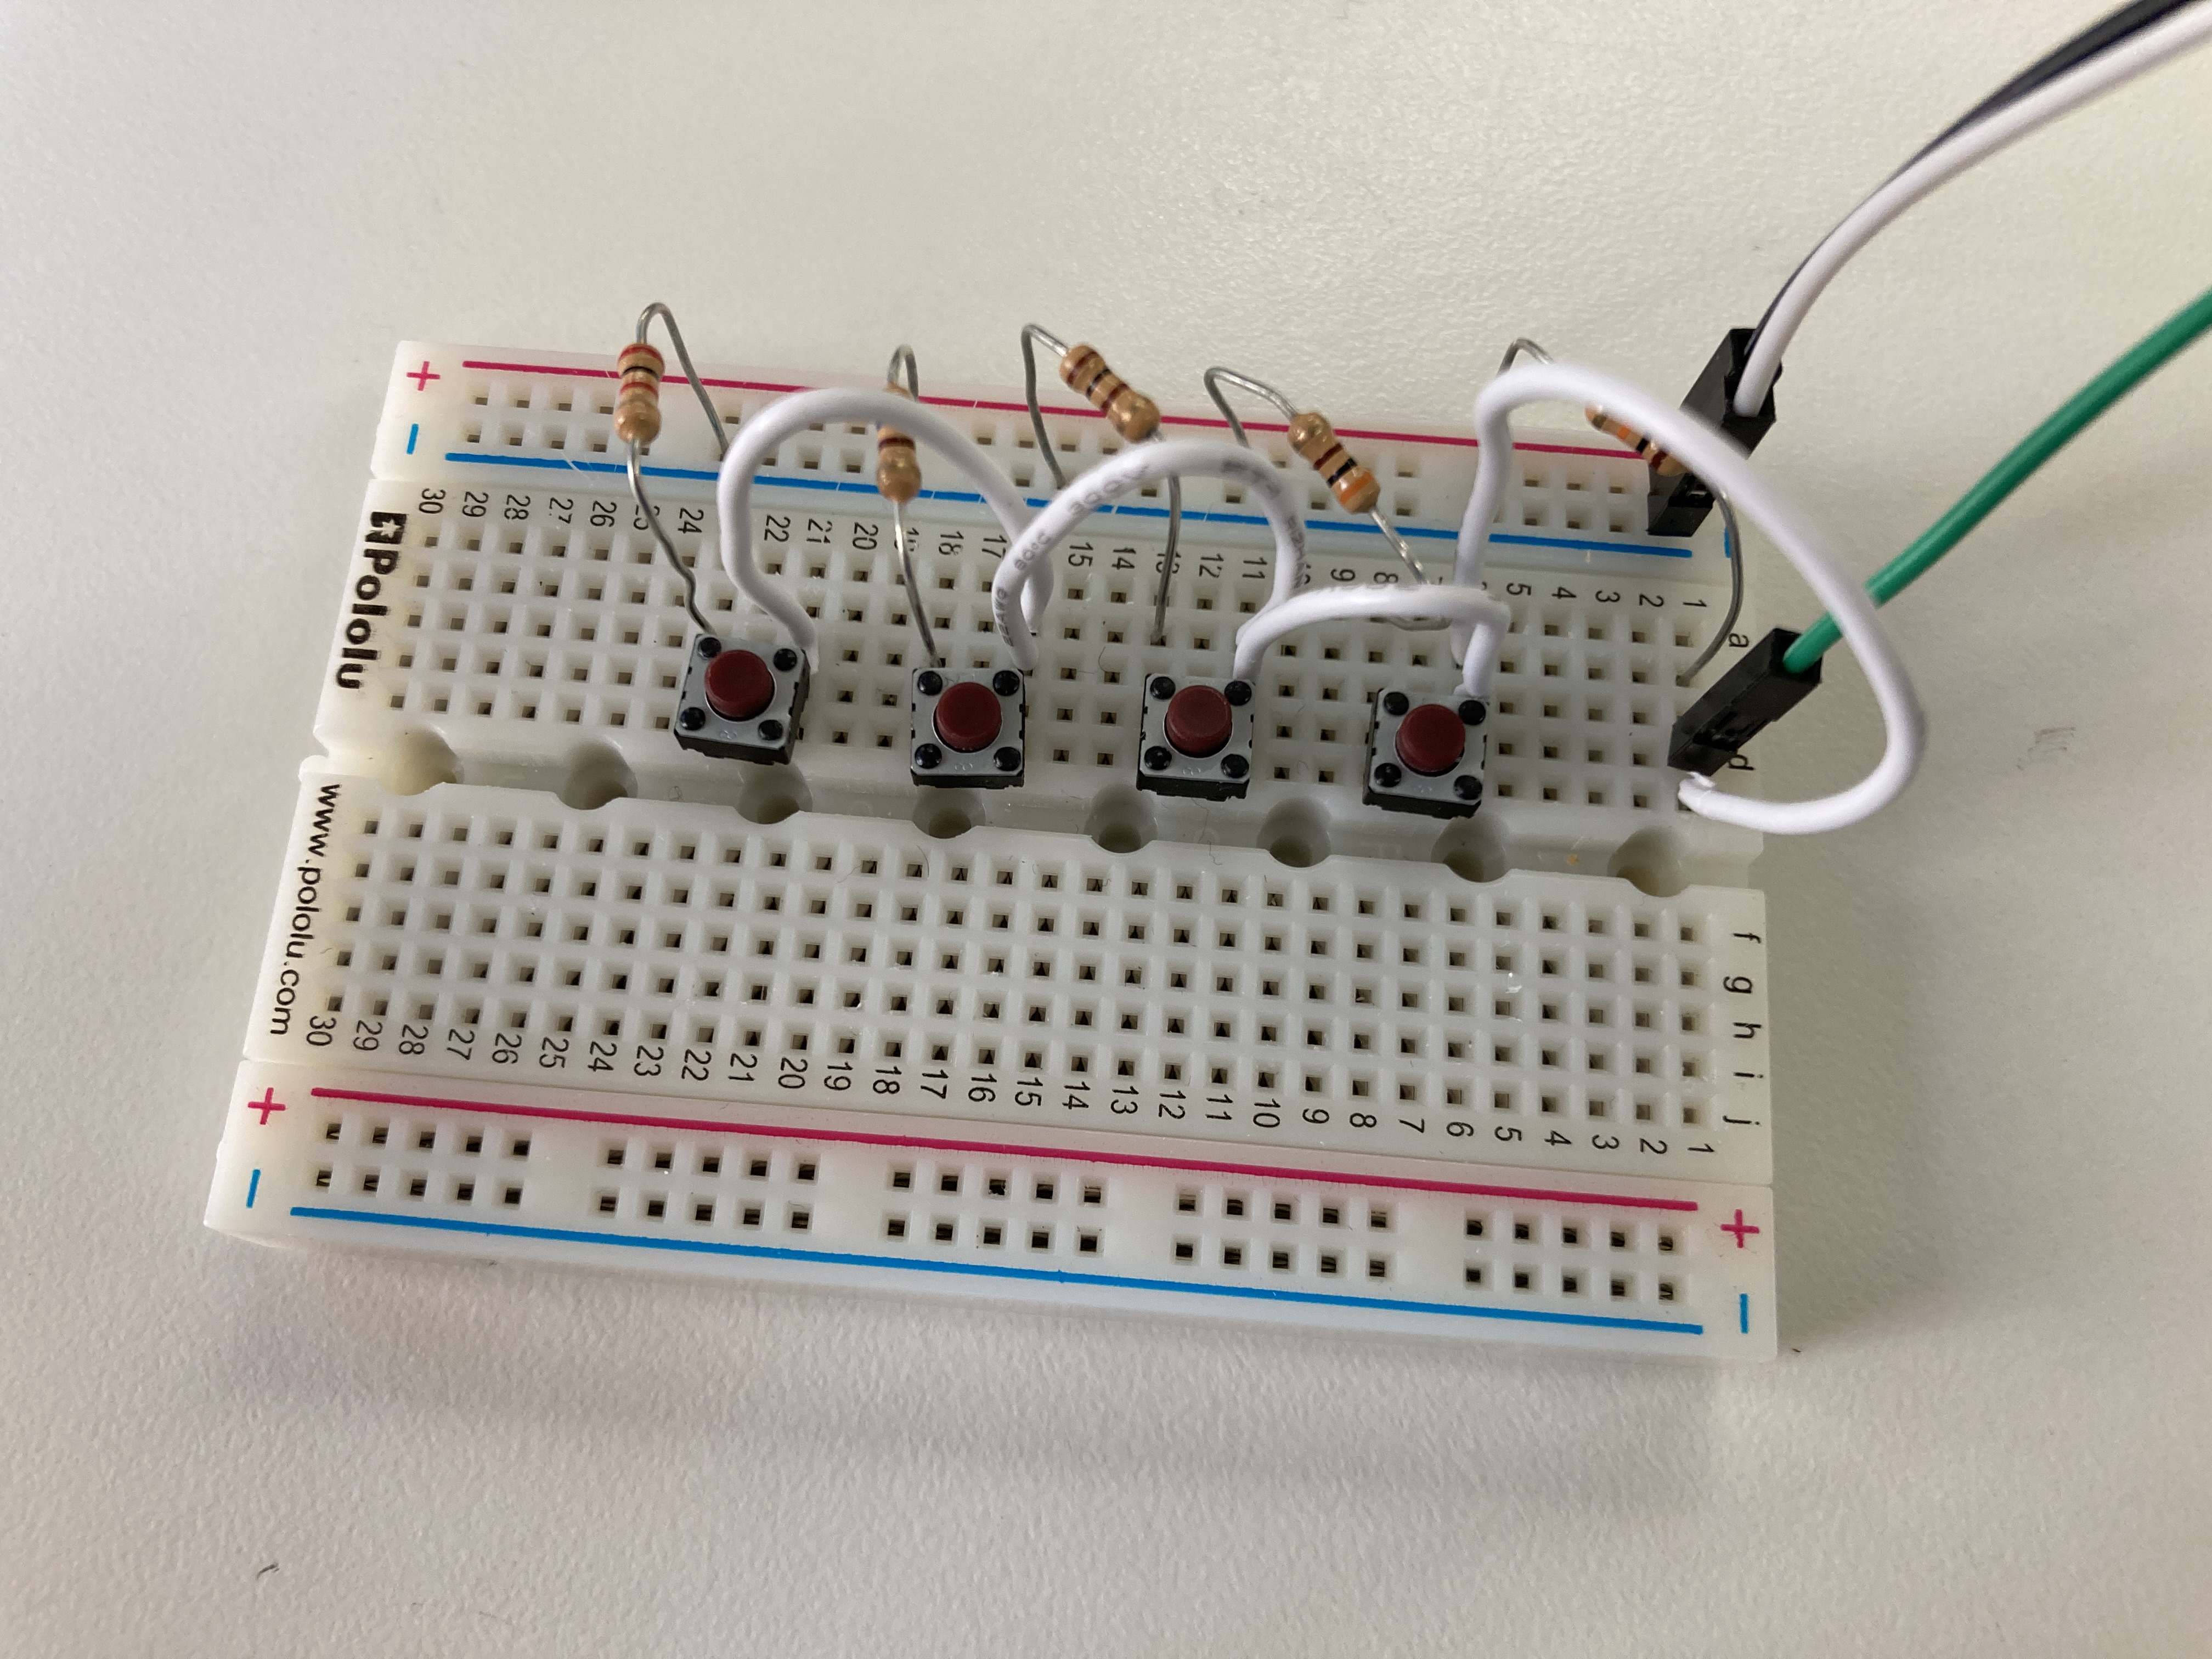
Unfortunately, there were some serious connection issues between my laptop and ESP32, so I couldn't make much progress fine-tuning this. Instead, I used a different machine to start working on the input. I started with just buttons as a proof-of-concept while Claire worked on RFID reading. I wired up buttons similar to how I did in week 6, and then connected to the NodeJS server as shown in the code below:
#include "Buttons.h" #include "Constants.h" #include#include #include const char* ssid = "MAKERSPACE"; const char* password = "12345678"; String directions[4] = {"forward", "backward", "left", "right"}; const String speedUrl = "https://ps70-api.vercel.app/speed"; const String directionUrl = "https://ps70-api.vercel.app/direction"; int lowerBounds[] = {400, 100, 750, 2400}; int upperBounds[] = {500, 200, 850, 2600}; Buttons bs = Buttons(BUTTON_PIN, lowerBounds, upperBounds); void setup() { Serial.begin(115200); WiFi.begin(ssid, password); while (WiFi.status() != WL_CONNECTED) { delay(1000); Serial.println("Connecting to WiFi"); } Serial.println("Connected to the WiFi network"); } void loop() { int buttonValue = bs.detectStart(); if (buttonValue != -1) { Serial.println(buttonValue); String direction = directions[buttonValue]; Serial.println("direction=" + direction + "&time=" + millis()); if ((WiFi.status() == WL_CONNECTED)) { HTTPClient http; http.begin(directionUrl + "?direction=" + direction + "&time=" + millis()); int httpResponseCode = http.POST(""); String payload = http.getString(); Serial.println(payload); Serial.println(httpResponseCode); http.end(); } } }
Here's what the button wiring looked like:

After this, we found our code was working as planned! Buy pressing the buttons, we could move the robot forward, backward, left, and right! Check out the video below to see what the little guy looks like when you press buttons!
Finally, we needed to attach all this to an RFID reader, so Claire modified my button code to write code for the RFID scanner:
#include#include //#include "Constants.h" #include #include #include //ESP32-SOLO-S2 //SDA --> ESP32 5 GPIO5 //SCK --> ESP32 11 GPIO18 //MOSI --> 21 GPIO21 (altered) //MISO --> 19 GPIO19 //IRQ attached to nothing //GND --> GND //RST --> 20 GPIO20 (altered) //VCC --> 3.3V const char* ssid = "MAKERSPACE"; const char* password = "12345678"; const String speedUrl = "https://ps70-api.vercel.app/speed"; const String directionUrl = "https://ps70-api.vercel.app/direction"; #define SS_PIN 5 //ESP32 pin GIOP5 #define RST_PIN 27 //ESP32 pin GIOP20 MFRC522 rfid(SS_PIN, RST_PIN); void setup() { Serial.begin(9600); // Connect to the wifi WiFi.begin(ssid, password); while (WiFi.status() != WL_CONNECTED) { delay(1000); Serial.println("Connecting to WiFi"); } Serial.println("Connected to the WiFi network"); SPI.begin(); // init SPI bus rfid.PCD_Init(); // init MFRC522 Serial.println("Tap an RFID/NFC tag on the RFID-RC522 reader"); } void loop() { if (rfid.PICC_IsNewCardPresent()) { // new tag is available if (rfid.PICC_ReadCardSerial()) { // NUID has been readed // print Tag Type MFRC522::PICC_Type piccType = rfid.PICC_GetType(rfid.uid.sak); Serial.print("RFID/NFC Tag Type: "); Serial.println(rfid.PICC_GetTypeName(piccType)); // print UID in Serial Monitor in the hex format Serial.print("UID:"); String content = ""; byte letter; for (byte i = 0; i < rfid.uid.size; i++) { Serial.print(rfid.uid.uidByte[i] < 0x10 ? " 0" : " "); Serial.print(rfid.uid.uidByte[i], HEX); content.concat(String(rfid.uid.uidByte[i] < 0x10 ? " 0" : " ")); content.concat(String(rfid.uid.uidByte[i], HEX)); } Serial.println(); content.toUpperCase(); // Forward Tag if (content.substring(1) == "A1 7C 8D 1D") { Serial.println("Forward Tag Recognized!"); Serial.println(); String direction = "forward"; Serial.println("direction=" + direction + "&time=" + millis()); if ((WiFi.status() == WL_CONNECTED)) { HTTPClient http; http.begin(directionUrl + "?direction=" + direction + "&time=" + millis()); int httpResponseCode = http.POST(""); String payload = http.getString(); Serial.println(payload); Serial.println(httpResponseCode); Serial.println("POSTED :D"); http.end(); } else { Serial.println("Wifi not detected."); } } // Backwards Tag else if (content.substring(1) == "2A 2A 75 17") { Serial.println("Backward Tag Recognized!"); Serial.println(); String direction = "backward"; Serial.println("direction=" + direction + "&time=" + millis()); if ((WiFi.status() == WL_CONNECTED)) { HTTPClient http; http.begin(directionUrl + "?direction=" + direction + "&time=" + millis()); int httpResponseCode = http.POST(""); String payload = http.getString(); Serial.println(payload); Serial.println(httpResponseCode); Serial.println("POSTED :D"); http.end(); } else { Serial.println("Wifi not detected."); } } // Left Tag else if (content.substring(1) == "37 23 27 7B") { Serial.println("Left Tag Recognized!"); Serial.println(); String direction = "left"; Serial.println("direction=" + direction + "&time=" + millis()); if ((WiFi.status() == WL_CONNECTED)) { HTTPClient http; http.begin(directionUrl + "?direction=" + direction + "&time=" + millis()); int httpResponseCode = http.POST(""); String payload = http.getString(); Serial.println(payload); Serial.println(httpResponseCode); Serial.println("POSTED :D"); http.end(); } else { Serial.println("Wifi not detected."); } } // Right Tag else if (content.substring(1) == "F7 08 2A 7B") { Serial.println("Right Tag Recognized!"); Serial.println(); String direction = "right"; Serial.println("direction=" + direction + "&time=" + millis()); if ((WiFi.status() == WL_CONNECTED)) { HTTPClient http; http.begin(directionUrl + "?direction=" + direction + "&time=" + millis()); int httpResponseCode = http.POST(""); String payload = http.getString(); Serial.println(payload); Serial.println(httpResponseCode); Serial.println("POSTED :D"); http.end(); } else { Serial.println("Wifi not detected."); } } else { Serial.println("Tag not recognized."); } rfid.PICC_HaltA(); // halt PICC rfid.PCD_StopCrypto1(); // stop encryption on PCD } } }
Here's a video of the finished product working with RFID!